Import & Export
The PastPaths Import & Export page lets you bring in data from other programs, export your own tree, and back up everything.
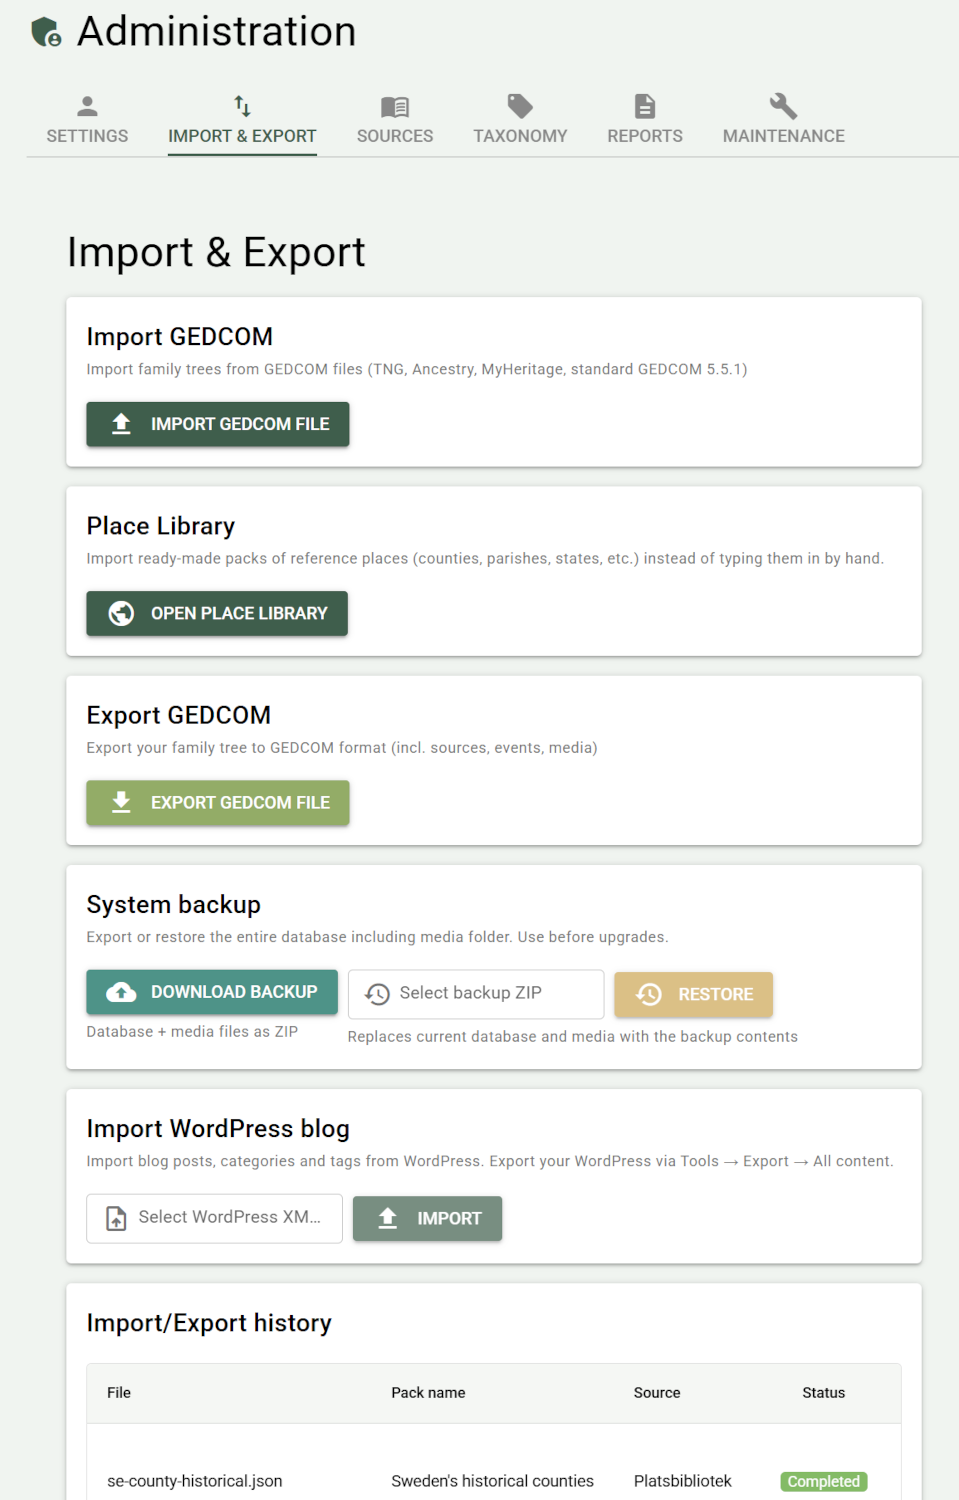
Import GEDCOM
GEDCOM is the standard format for moving family trees between programs. PastPaths supports import from:
- Standard GEDCOM 5.5.1 — works with most programs
- Ancestry.com —
_APIDand other Ancestry markers are handled correctly - MyHeritage —
_MHIDand MyHeritage-specific fields are preserved - TNG (The Next Generation of Genealogy Sitebuilding) — TNG-specific fields are handled
Click Import GEDCOM file to open the import dialog. There you choose a file and confirm the import.
Detailed guides for each format:
Place Library
Ready-made packs of reference places (counties, provinces, dioceses, ports, etc.) that you can import with one click instead of typing them in by hand — handy for avoiding the same place spelled differently depending on when you entered it.
The Place Library has a tab of its own: Administration → Library. That's where you browse the available packs and import the one you want. The import shows up in the same history as GEDCOM imports at the bottom of this page, and can be undone from there.
Requires internet
Unlike the rest of PastPaths, the Place Library's pack list and pack files are fetched from pastpaths.se — an internet connection is needed for this feature specifically.
→ More about the Place Library
Export GEDCOM
Click Export GEDCOM file to export your entire tree to a .ged file. The file is saved in your Downloads folder, and a notification shows the exact path. From there you can open the folder or copy the path.
The export includes persons, relationships, events, sources, and media references. Places carry their coordinates, and PastPaths' own subtags preserve each place field separately so a re-import into PastPaths is exact.
Citations on places aren't carried over
The GEDCOM format has no place for a citation attached to a place. The sources are included in the file, but the link to individual places is not.
Re-import
An exported GEDCOM file can be imported into PastPaths again — for example, to move your data to a new installation. Use the regular GEDCOM import for this.
Import a WordPress blog
Do you have a WordPress blog you want to move to PastPaths? You can import posts, categories, and tags from a WordPress XML export file.
Export from WordPress:
- Log in to your WordPress site
- Go to Tools → Export
- Choose All content
- Download the generated
.xmlfile
Import into PastPaths:
- Choose your
.xmlfile in the Choose WordPress XML file field - Click Import
- Once the import is done, a summary is shown with the number of posts, categories, and tags
Images from WordPress:
The WordPress export doesn't include the actual image files — only links to them. Click Download WP images (shown after the import) to fetch the images from your WordPress site and add them to the media library. The site needs to be reachable online for this to work.
System backup
The system backup creates a ZIP file with the entire database and all media files — a complete snapshot of your installation.
Download a backup
Click Download backup. The file is saved in the backups folder in the PastPaths installation directory. The size is shown in the notification once it's done.
Back up regularly
Make a backup before upgrading PastPaths or importing large amounts of data. It's the fastest way back if something goes wrong.
Restore from backup
- Choose a previously saved backup ZIP in the Choose backup ZIP field
- Click Restore
- Confirm in the dialog — an automatic backup of your current data is created before the restore begins
Restoring replaces all data
Restoring overwrites the entire database and media folder with the contents of the backup. Anything added after the backup was created will be lost.
Import/export history
At the bottom of the page, a table shows all imports and exports. Here you can see the status, progress, and statistics for each entry.
Undo an import
Imports with the status Done can be undone. Click the undo icon (↩) next to the row. A preview shows how many persons, events, places, media files, sources, and citations will be removed — then confirm to carry out the undo.
Cannot be undone again
The undo operation is permanent. There's no "undo the undo."
Tags that were created automatically during the import (e.g. -gedcom-import-2026-05-09) are not removed — only the actual entities.